ATTENTION YOUTUBERS, BLOGGERS

ATTENTION YOUTUBERS AND BLOGGERS :
YOU ARE NOT ALLOWED TO COPY THE TUTORIALS FROM THIS BLOG AND PRODUCE THEM AS YOUR OWN WHETHER ON PRINT OR ELECTRONIC MEDIA OR SHOW THEM ON YOUR BLOGS OR YOUTUBE CHANNELS.YOU ARE ALLOWED TO SHOW THE FINISHED WORK BUT PLEASE LINK BACK TO THIS BLOG FOR THE TUTORIALS.IF FOUND COPYING, I WILL REPORT YOU TO YOUTUBE AND ADSENSE.

Friday, August 24, 2012

Long and short stitch direction


My long and short stitch is far from perfect.So, in order to improve on this stitch and to learn more on needle painting, I did some research on the internet and found an exciting article on stitch direction for flowers and leaves.Please click here   to read the article.


Although it stated the need to draw circles, that’s not necessary.Just find the point of attachment between the flower/leaf and its stem (point O) and draw straight lines from this point to the outline of the petal/leaf.These are the directional lines when working the long and short stitch.


After reading the article, I knew I had to experiment and find out myself if it really works.My first attempt was to embroider a simple leaf and the result is what you see in the picture above.I’ll show you the step by step pictures of this leaf in my next post.
 I found some more great tips from the same website :

*Parallel veined vegetation is the largest exception.(I’m not really sure what it means but I think for leaves with parallel veins, you can’t follow the stitch direction rules and the stitch has to be worked parallel to the veins)
*For turn-over leaf – slant the stitch from the edge in the direction which would reach the center IF THE LEAF WERE LAID OUT SMOOTH.
Well, I’ll love to hear from you.How do you work your long and short stitch?

Sunday, August 12, 2012

Flower stitch 3 - Part 2


I’m sorry for the delay in publishing this post.I’d to deal with a personal loss – the death of my beloved puppy, Blackie.I’ve yet to recover from the shock, waiting for the day when I will be strong enough to say – ‘This too shall pass’.
Below are a few more examples of Flower stitch 3.Please click here for the tutorial.


This is another variation of twisted chain flower.Here, the loops were made at the tip of each petal.


This one is done with smooth purl, using 2 strands of silk thread.A reader asked me where she could purchase purl(zardosi thread) in Bangalore.I hope that someone who lives there can help her.If you want to buy it online, try ebay.


Here is another example – ribbed wheel method.Since 2 different threads were used, it’s easier if you work all the straight stitches first and then embroider the buttonhole wheel by inserting the thread under the straight stitches.If you use a single thread, work it continuously, like in the tutorial.After finishing this part, proceed to work the ribbed wheel on the straight stitches.


This stitch can also be used to fix sequins.8 sequins were needed here but don’t reduce the number of spokes on the buttonhole wheel and work the wheel and sequins continuously.


These sequins are quite wide, so I needed only 6 and I’d made an 18-spoke buttonhole wheel.Use your imagination – it’s really simple.

Saturday, July 28, 2012

Flower stitch 3 - part 1


Today, I would like to show you a tutorial for another flower stitch which is a combination of buttonhole wheel and other stitches.I want to clarify here that ‘flower stitch’ is not the name of the stitch itself but rather a way of me listing stitches that look like flowers under this category.This flower is really simple to stitch.


Divide a 2.5cm diameter circle into 16.Draw a smaller, 1.25cm diameter circle in this circle.Work buttonhole/blanket stitch, as shown.


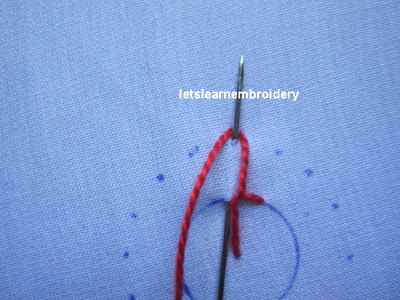
Insert the needle to the left of this stitch (at this point, you can even use a different coloured thread), bring the needle up and wrap the thread under the needle.


A lazy daisy stitch is made.


Continue in this manner till the end of the circle.


Here, Basque stitch was made on the buttonhole wheel.I’ll show you more examples in my next post.

Sunday, July 22, 2012

Basque stitch peacock


I wasn’t feeling well for the past few days, so I hope that I’m not too late for this week’s TAST challenge. Today, I’d stitched another peacock, this time using Basque stitch for the feathers.


The body is herringbone stitch.You can add as many layers of feathers but make sure that you work the topmost feathers first and then the layer below it and so on till you reach the bottom layer.This will make the layers overlapping beautifully.


This is another trial – a combination of buttonhole wheel and basque stitch, worked continuously.The tutorials for this and another one, done on shisha/mirror are coming soon!

Thursday, July 5, 2012

Mirror work 5


This week’s TAST challenge is bonnet stitch.When I saw this stitch worked in a circle on Sharon’s blog, I knew I had to try this on a mirror/shisha.When worked on a mirror/shisha, the stitch has to be worked close to each other.Below is the sunbonnet mirror work tutorial:

This mirrorwork is my own creation.You are not allowed to copy the tutorial and produce it as your own whether on print or electronic media, on your blog or youtube channels.You are allowed to show the finished work but please link back to this page for the tutorial.


Draw a 2.5cm diameter circle.Fix a mirror (1.25cm diameter) in the middle with straight and diagonal stitches.Bring the needle up near the mirror.Work a straight vertical stitch and come up at a point to the left of this stitch.


Bring the needle under the straight stitch.


Bring the needle and thread over and under the foundation stitches, as shown.


Take a stitch from right to left at the position shown. (Please refer Sharon’s tutorial to understand this better)


Pull the thread (use equal tension all around to get beautiful, rounded center).Enter the needle in the same hole as the previous one and bring it up at the left.Wrap the thread under the needle and pull through.


Once again, bring the needle and thread over and under the foundation stitches.Continue as above.


You can see here that the loops at the base of the bonnet stitch are actually worked on the foundation stitches.


This is the position where you should end your stitch.


Mission accomplished!What do you think?

Sunday, July 1, 2012

No-stitch peacock


Today, I would like to share with you another simple peacock design.This peacock requires no stitching at all.


For this, you ‘ll need some rounded and teardrop shaped stones, 3-D glitter glue and fabric glue.


Arrange the stones to form the body of the peacock.3 teardrop shaped stones are needed for the head and wings.Stick each stone with fabric glue and draw the legs, using glitter glue.


Arrange and glue more teardrop shaped stones for the ‘eyes’ of the tail feather.


Using glitter glue, draw the tail of the peacock.Please excuse my drawing of the peacock feather – it was done in a hurry.I’m quite sure you can draw better than this.For those of you who don’t have glitter glue, you can even embroider the legs and tail.Hope you get the idea.I hope some of you will try this and leave your links in the comment box below.I have other ideas for this peacock.When I have the time, I’ll try and share them with you.

Monday, June 18, 2012

Smooth purl & check purl


A few weeks ago, I’d written a post on smooth purl.Today, I would like to give more details on that.Smooth purl is widely used in goldwork embroidery.In Indian goldwork embroidery, it’s called zardosi thread and can be seen on sarees and dresses.The purl is actually a spring-like metal that needed to be cut into small pieces and then sewn onto fabric.Some even stick it with glue.Great care must be taken when handling this purl because it can become damaged easily.


The smooth purl normally comes in small packets like these.Each packet costs me Rs 2.50 (US 5cents?).


This is the length in each packet.This piece is quite perfect but most of it are damaged.When cutting, you’ll have to discard the damaged parts.


It’s actually like a tube and you can insert a needle and thread into it.


When pulled, the purl will never go back to its original length.


This is another type of purl – the check purl.


Close-up of check purl.
I’d tried a few flower designs out of this purl which I would like to show in my coming posts.


A sneak peek into my latest project which uses purl.It’s still in it’s early stage.Not having any experience with purls before, God knows how it will look like or whether I’ll be able to complete it.Just wait and see.